I recently fitted a challenge rear grille to my F355. Here's how I did it.
Tools and supplies needed:
- 8mm socket
- 7mm spanner
- Small ratchet
- 4 inch extension bar (I recommend using stuff from a 1/4 inch socket set because access is tight in places)
- Pop rivet gun
- A 3mm drill bit
- 2x3.2mm pop rivets
- Cross head screwdriver
There are four nuts across the top but only two are accessible initially. These two that are accessible can be found just above the outer lights.
The remaining two nuts across the bottom can be found on the very outer edge, inside the rear wing at the lower corner of the panel. To get to these two you will need the 4 inch extension on your ratchet. You may find it easier to get your hands in for these two if you temporarily remove the rear light fittings (as though changing the bulbs).
Don't attempt to remove the panel yet, as it won't move since there are still two nuts holding it on at the top behind the small black grille. To access these you need to remove the trim piece and the four screws holding the small grille in place.
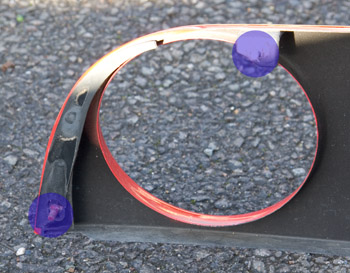
The trim piece is held on with two rivets at either end, from the underside through into the top corner of the rear wing. To remove these rivets you need to drill them out with a 3mm drill. You may wish to start with a 2mm drill instead to avoid enlarging the holes too much. Drill slowly and blow the swarf from the bodywork when done. You will have to hold the drill at a slight angle due to the position of the rear lights. Once the rivets have been drilled out and pushed through, you should be able to remove the thin black trim piece from the car. It may take a bit of an effort to remove it; go carefully, pull evenly, and it should come free.
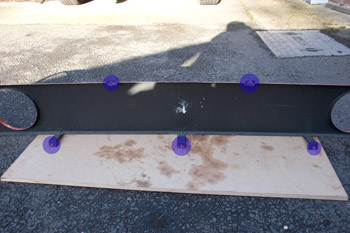
Once the trim and small grille has been removed, you will be able to access the last two nuts holding the rear panel in place. Carefully remove the rear panel, and you're half way there !
To refit the grille, slide it carefully into place and lightly secure all of the easily accessible nuts. Next, do the lower outer edge ones, again using the 4 inch extension on the ratchet. Snug up the two on the top that sit behind the small grille, then slide the small grille back into place. Put the trim piece over the edge, making sure it catches the top edge of the small grille, and insert but don't tighten the four screws along the top. You now need to re-rivet the trim in place. Use two 3.2mm rivets (make sure the old rivets have been removed). Be careful not to hit the light clusters when the rivet pops. Once the rivets are in place, tighten the top four screws properly.
If you removed your light fittings, put them back in place. On a European car it isn't possible to get the lights the wrong way around because of their shape and of the fact that one fitting has room for only two bulbs whereas the other has room for three bulbs.
If your grille didn't come with a badge, you'll need to remove the old one from the original panel. Two 7mm nuts and you're there. The badge can be refitted with the grille in place on the car, or you can put the badge on before you fit the grille to the car – it doesn't matter either way is fine.