
With the car sitting on the engine dolly, there are 20 subframe bolts to remove. They are located in the following positions:
- 6 bolts on each side holding the engine subframe to the main chassis crossmember beneath the fuel tank (12 bolts total)
- 2 bolts each side holding the top of the engine subframe to the chassis, just below the engine cover and above the top of the dampers (4 bolts total)
- 2 nuts and bolts each side holding the rear of the engine subframe to the exhaust subframe section (4 nuts and bolts total)
Here's the front left side. Access is relatively easy for these, although you'll need various extensions or universal joints to make it a bit easier:

You can just see one of the first pair of holes where the bolts have been removed on the left. The two middle bolts are clearly visible. There is another two not visible on the remaining part of the flange underneath that aircon pipe on the right hand side of the image.
The right hand side of the chassis subframe has the same six bolts but access is harder because the oil tank is in the way. You must approach the bolts from underneath and work mostly blind. This is where I realized that a taller engine dolly would have been better because I would have been able to swing a ratchet more easily.
I also realized that there are so many bolts holding the engine subframe in place that you can actually completely remove the two hardest ones on the right hand side with the car in the air, thus making the whole job a lot easier. I did this at refit time. I think I put 5 in the right hand side and then put the sixth one in with the car up in the air where it was much easier to do.
Here's the two upper subframe connections next to the damper. Look at the top of the image to the left and right of the spring, with the right hand one being just in front of the coil pack. When you drop the engine you will see that the top side of the cradle has raised cones on it. These enable the chassis to reliably locate on the subframe when the engine is reinstalled.
I noted that all of the bolts removed had anti-seize compound on them and would ensure that this was refreshed when re-installing everything.
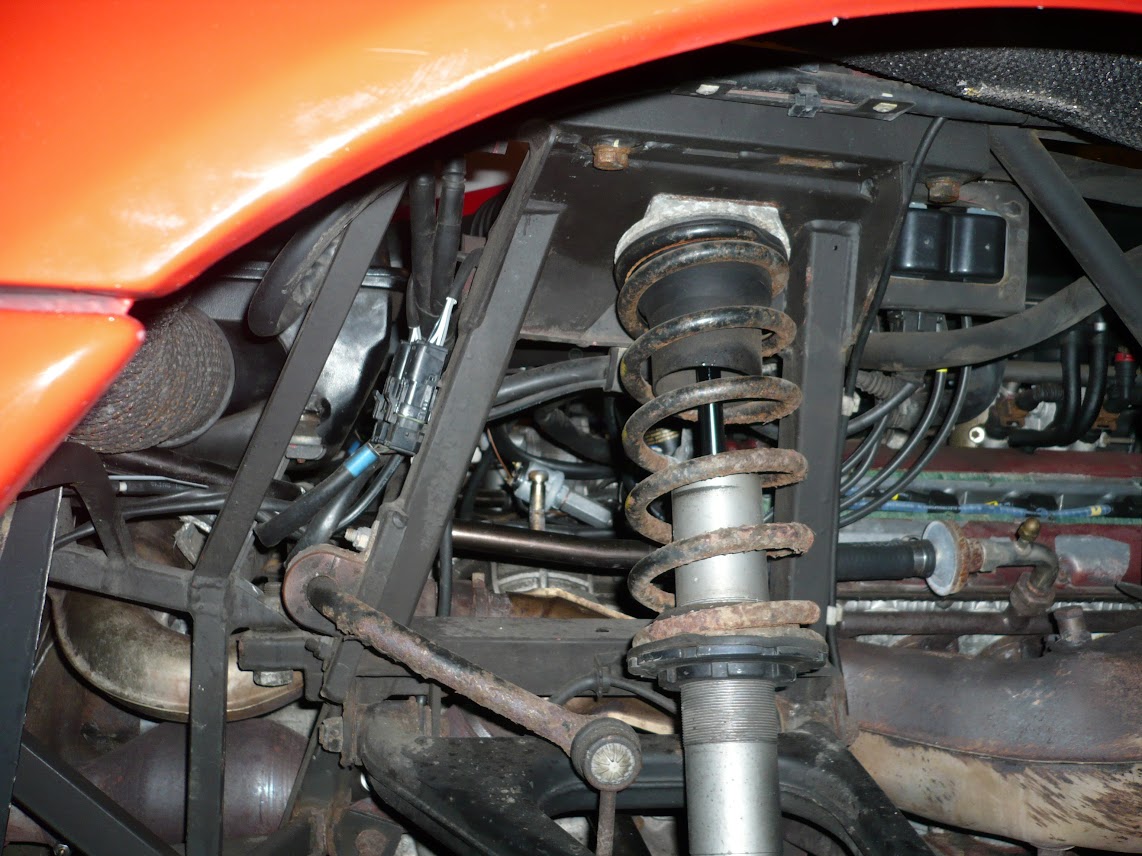
In the above image you can also see the upper rear subframe bolt. It is hiding just to the left and slightly beneath the anti-roll bar bush with the curve of the exhaust Y pipe in the background. That bolt is mounted vertically with the nut on the top. The lower bolt is not visible but if you follow the diagonal chassis rail on the lower left corner of the image down to its end then you'll find it there.